Users
Clicking on the Users menu item will open up a list of all Company users (if any exist):
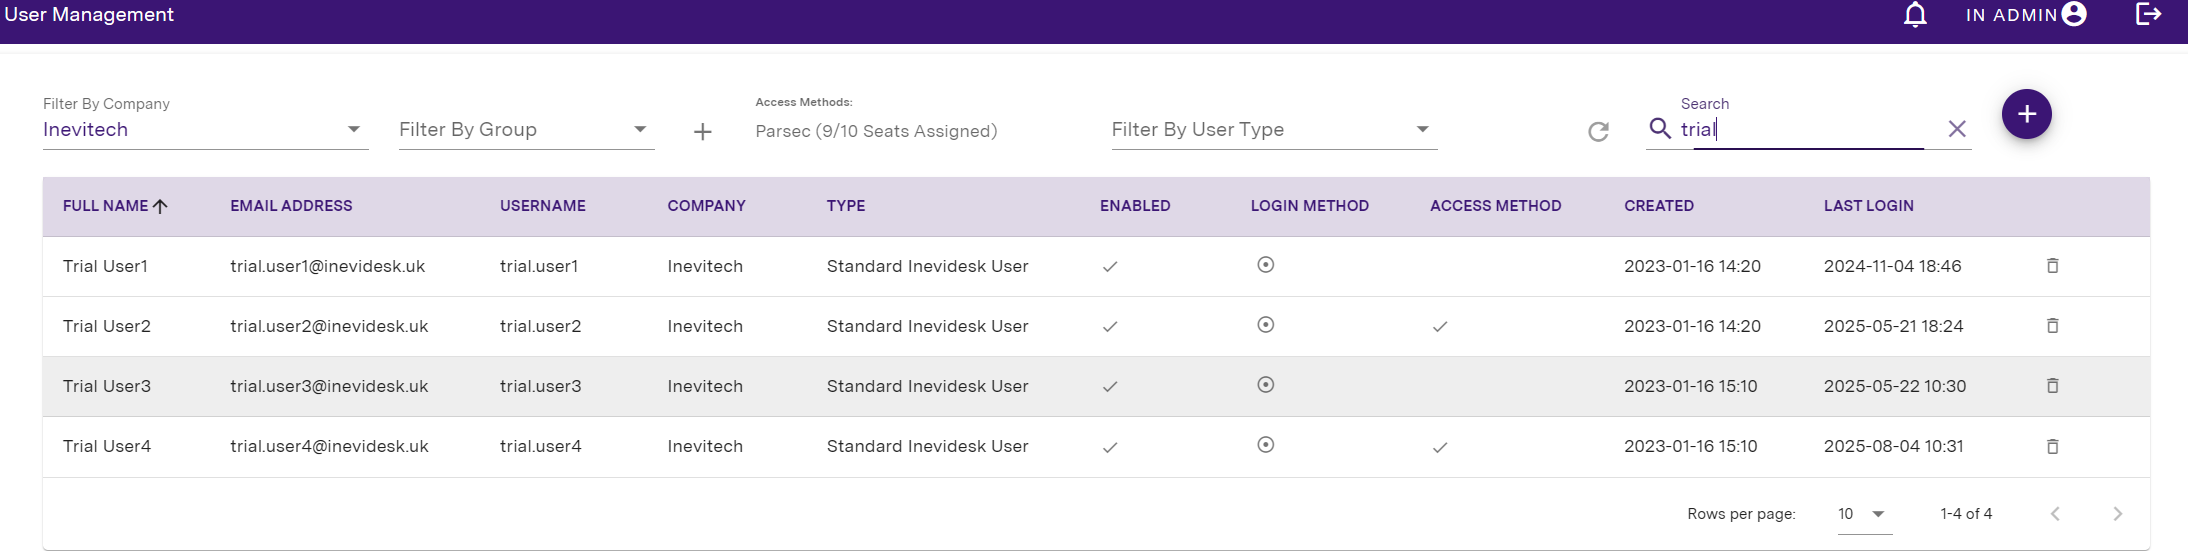
If required, you can export a spreadsheet file containing all of your users and associated information using the icon.
Clicking the icon will generate and download the file to your device.
The results in the report are based on what is (or isn't) being searched using the search bar. If you run a search and click the export icon only items matching that search will be shown in the report. Otherwise, all items will be shown by default.
User creation / authentication
Creation using AD Sync
Users can be created automatically using our Active Directory syncing application. If you would like to do this, please email support@inevidesk.uk with your AD domain name so we can generate a setup token for you.
You will also need to create a security group in your AD (we suggest “Inevidesk”!) and populate this with all the users that you would like to have Inevidesk user accounts.
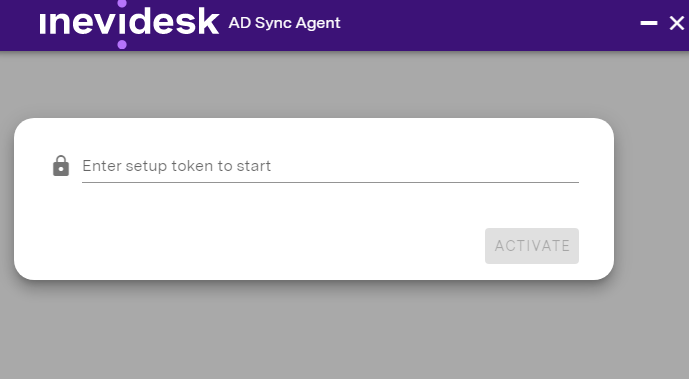
Once we reply to you with a setup token, please download and install our syncing application from the following link.
After installing, it will prompt you to paste in the setup token then users should begin syncing with our portal.
Please note the AD sync occurs every 15 minutes.
User accounts are created in our portal when an AD user is assigned to a vdesk for the first time.
If your AD user will be accessing their vdesk using Parsec, please make sure to click on the user in the users page and assign the “Parsec” Access Method in the Edit User menu.

The sync application needs to be installed on a server as it maintains a constant connection with our portal so when users log in to Inevidesk it checks “live” whether they should have access.
This means user password resets or users being removed/disabled take effect immediately.
Once AD sync is setup, the status of the sync will be displayed on the User page:

You may also see a message that the AD Sync Agent is configured but not connected:

If that's the case, please check all Inevidesk AD Sync events in your Windows Application logs to make sure nothing is preventing the agent from running.
Manual creation
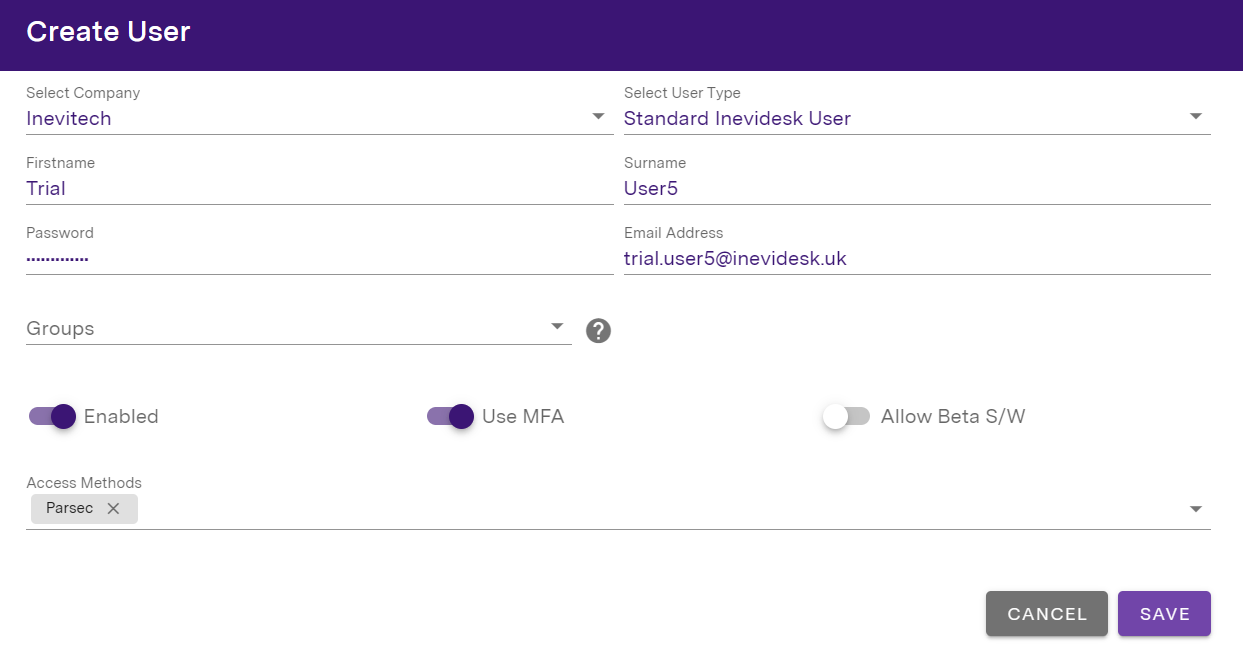
Users can also be created manually, by going to the Users menu item and clicking the button and filling out the form.
If the user is going to access their vdesk using Parsec, please select this from the Access Methods drop down.
In the main Users menu item you will be able to see their name, email, username, type (admin or standard), whether or not the user is enabled, whether they are an Active Directory (AD) user, if they have an Access Method defined and what date they were created.
If you require an additional Company Admin then please contact support@inevidesk.uk with the details of the user that requires such permission.
To disable a user simply turn the Enabled slider off then save. If they are an AD user then you need to remove them from the Inevidesk group in AD (this will remove the user from Inevidesk after 1 hour).
Multi-factor authentication (MFA)
MFA can be enabled by selecting the user in the Users menu item, then selecting the MFA slider.
We use TOTP MFA by default and strongly recommend that all users have MFA enabled to help ensure the security of your systems.
![]()
Single Sign-on (SSO) using Microsoft
Clients using Microsoft's hosted authentication services can use those credentials to access the Inevidesk client application and administration portal.
Please contact support@inevidesk.com with your Entra (formerly Azure AD) tenant ID in order to get this set up. Once completed, users will be able to use the Sign in with Microsoft button to access Inevidesk with their Microsoft credenitals.
If the email used to log in to Inevidesk using Microsoft belongs to an existing user created manually or via AD sync then it will be automatically converted to an Entra login.
New users must log in first in order for their Inevidesk user accounts to be created. This will then allow you to assign a vdesk to that user account.
Password reset
If the user is an AD user then you should reset their password in AD.
If the user was created in our portal, passwords can be reset by clicking on the icon in the Edit User menu.
Permissions
You can control what a user has access to by clicking on the user and assigning a User Type in the Edit User menu. There are five roles to choose from:
Standard Inevidesk User
The user is able to use the Inevidesk application to access virtual desktops and resources assigned to them.
No access to the administration portal.
Company Admin
The user has access to the administration portal and basic admin permission.
Company admins can create standard users within their own company and assign them resources through the portal.
Global Company Admin
The user has the same access level as Company Admin, plus the ability to administer child companies and their users.
Primary Company Admin
The user has the same access level as Global Company Admin but can also create other admins of lower permission levels.
This is the only user type able to create other admins and can only be assigned by the Inevidesk team following approval from the company's designated contact.
Company Server Admin
A special role only available to admin user types.
Allows the user to manage Inevidesk virtual servers through the portal. Only applicable for IaaS customers.
Preserving user profiles
vdesks can be destroyed and recreated with updated templates at any point to push out new configurations or software deployments very quickly.
Using Microsoft's FSLogix you can preserve user profiles during this process to maximise efficiency and reduce workload. FSLogix is included in a range of virtual desktop licensing. Note that this will require additional storage on your server.
Please read instructions on how to use the software here.
Access Control
Access Control settings are set live and are verified whenever you open the panel. Please note that it may take a second to load as it verifies the settings on the vdesk.

This feature checks that a vdesk has the same settings as those assigned in the admin portal. The portal will notify you if there is any mismatch.
Parsec - relay server
If you are a Parsec connection customer then you will have 1 or 2 Parsec relay servers configured on your pod(s). Using the relay server means you only require 1 (or 2) ports open on the firewall inbound in order for users to be able to connect to their vdesks, otherwise you will need more open ports for each vdesk.

To enable this, select the Use Parsec Relay Server slider and fill out the host and port information.
If you want to force the config to the vdesk immediately, select Force push port/relay config which will restart Parsec on the vdesk and disconnect any connected client.
To save the relay configuration to every vdesk on the site, select the Save as default for site checkbox. Please note this only saves the settings to every vdesk on the site. It does not apply that configuration to every vdesk.
If you also need to apply the configuration, select the Apply to all vdesks on site checkbox instead.
If all Parsec traffic should be routed via the relay (to avoid VPN connections if they are connected) select the Force all connections through relay option. We recommend this is selected for simplicity.
Additional relay settings
If you need to, you can change the Parsec relay settings within the Access Control panel.
Click the Additional relay settings dropdown menu, select the appropriate option then click Save to apply the configuration to the vdesk.
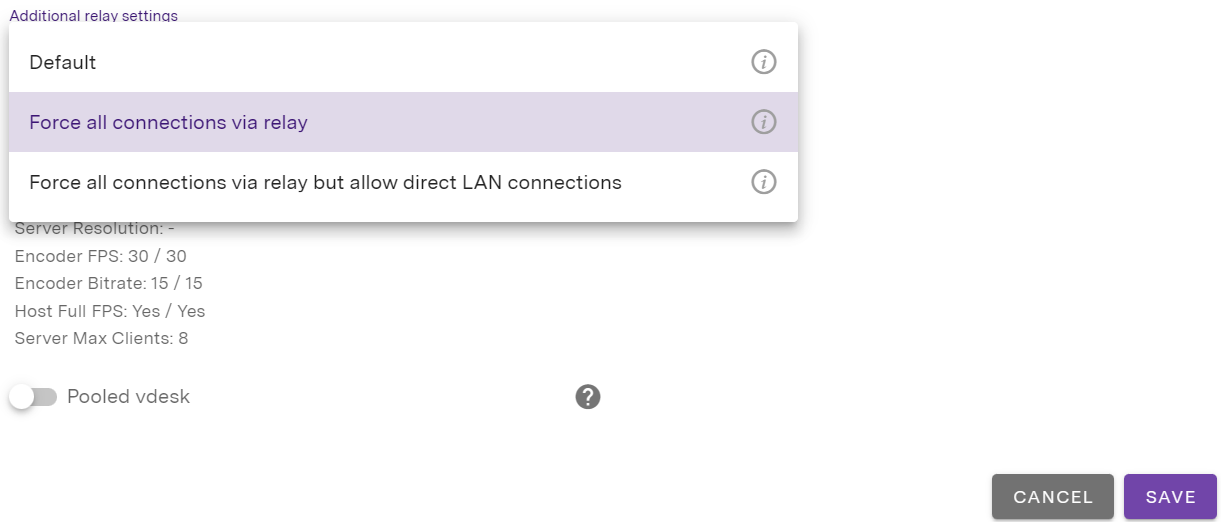
- Default
Parsec's default connection negotiation behaviour can result in a successful P2P connection without using the relay if the host peer has outbound UDP connectivity to the internet and the client peer's router/firewall supports UPnP or UDP hole punching.
It will also work if you have specified a port for each vdesk and have added the appropriate inbound port forward on your firewall.
- Force all connections via relay
Use this setting to ensure remote clients that also have VPN connections to the pod location use the relay and not the VPN.
This should not be set if your user will also need to connect to their vdesks from the same LAN if your pods are on-premise.
- Force all connections via relay but allow direct LAN connections
Use this setting to ensure remote connections use the relay but also allow a direct LAN connection if it is available.
Note that if the user is remote and has a VPN connected to the pod location then it will use this instead of a direct connection via the relay.
Parsec - virtual displays
You can change the number of virtual displays available to Parsec through Access Control. If the client device EDID’s are not loaded, use the dropdown to add virtual display(s) through portal:

Parsec - additional configuration
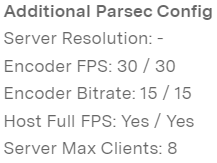
Access Control will also show what some of the host settings are set to via the "Additional Parsec Config" info displayed in the bottom left corner of the panel.
Please note these will change as the end-user changes any of the settings (i.e. display mode or resolution).